


 English
  عربى
عربى 

Industry News
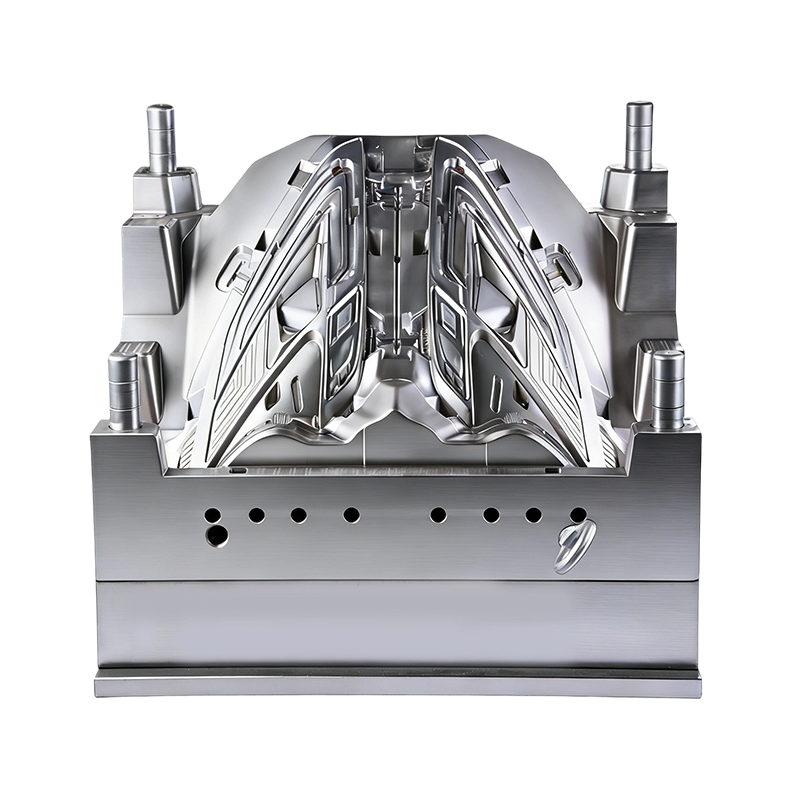
Tail Lamp Assembly Mold: Precision Tooling for Cars
2026-06-19
A car tail lamp is not just a red plastic cover. It has multiple chambers. Red for stop and tail. Amber for turn signals. Clear for reverse lights. A tail lamp assembly mold creates these complex parts. The mold holds tight tolerances. The lens must seal against the housing. Water inside a tail lamp means a failed safety inspection.
What the Mold Does
The mold creates the lens, housing, and reflector
A simple tail lamp uses one mold for the lens and another for the housing. A tail lamp assembly mold for a modern lamp might do more. Two-shot molding puts red and clear plastic in the same lens. The mold rotates between shots. The red plastic goes in first. The clear plastic bonds to it. No separate assembly step.
The housing mold includes features for bulb sockets and vents. Vents let air escape as the lamp heats up. But water cannot get in. A tricky balance.
Mirror polish is required on optical surfaces
The reflector behind the bulb needs to be smooth. Any roughness scatters light. The tail lamp looks dim. A tail lamp assembly mold has optical-grade polish on reflector cavities. Ra finish below 0.02 microns. That is mirror-like.
Lens surfaces also need polish. But the lens has prismatic patterns molded in. These patterns direct light. The mold creates these patterns with electrical discharge machining. EDM burns the shape into the steel. No other method works for such fine details.
Why These Molds Are Different
Multi-material molding needs precise temperature control
Red plastic and clear plastic shrink at different rates. The tail lamp assembly mold needs separate temperature zones. The red section runs hotter. The clear section runs cooler. Wrong temperatures make the two plastics separate. The lens delaminates. The lamp is scrap.
Here is what the mold needs for multi-material work:
- Separate heating and cooling circuits for each material
- Precise alignment between mold halves for multiple shots
- Shut-off surfaces that seal perfectly to prevent material mixing
- Ejector pins that do not damage the first shot before the second
- The housing must seal against the lens without gaskets
Many tail lamps use vibration welding. The tail lamp assembly mold creates a welding rib on the housing. The rib is a small triangle of plastic. The lens sits on top. Ultrasonic vibration melts the rib. The parts fuse together. No gasket needed.
The welding rib needs a sharp edge on the mold. A rounded edge will not melt properly. The lamp leaks.
What Goes Wrong with Cheap Molds
The two plastic colors bleed into each other
Cheap molds have poor shut-off surfaces. Red plastic leaks into the clear area. The lens looks dirty. The customer rejects it. The lamp is scrap.
The reflector surface loses its polish over time
Soft steel wears. The polished surface becomes rough. The tail lamp output drops. The driver behind cannot see the brake light. Safety issue. The mold needs new polishing or replacement.
The welding rib is too short or too tall
If the rib is too short, the lens does not melt into it. No seal. Water gets in. If the rib is too tall, the lens cracks during welding. Same result. Leaks.
A tail lamp assembly mold is a precision tool. Bad molds produce lamps that leak or look wrong. Drivers need working tail lamps. Moldmakers who cut corners put people at risk. Use hardened steel. Control temperatures precisely. Polish optical surfaces to mirror finish. Your lamps will pass inspection. Drivers will see them. That is the whole point.


- VISIT US:
- Zhuling Village, Beicheng Subdistrict, Huangyan District, Taizhou City, Zhejiang Province, China
- CONTACT US:
-
-
[email protected]

-
+86-18057683888

+86-13666493686
-
- GET IN TOUCH
Copyright ©
Zhejiang Taizhou Hongya Mould Co., Ltd.
All Rights Reserved.
 Mold Supplier And Mold Customization Manufacturer
